Easy Steps to Change Needle in a Singer Sewing Machine
Navigating the mechanics of a Singer sewing machine may seem intricate to the novice eye, yet understanding its components and functionalities can be simplified with a bit of guidance. One of the fundamental tasks in maintaining an efficient sewing process is learning how to change the needle. This essay elucidates the parts of the Singer sewing machine, with specific focus on components like the needle, needle clamp screw, and the needle bar that play direct roles in needle replacement. Furthermore, the subsequent segments delineate a systematic approach to remove the old needle and insert a new one, turning this seemingly complex task into an easily executable procedure for any user.
Understanding the Singer Sewing Machine
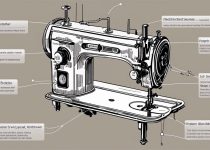
Understanding the Singer Sewing Machine Parts
The Singer sewing machine, much like any other sewing machine, is made up of several major components. The most relevant to changing the needle are the needle itself, the needle clamp screw, and the needle bar.
The Needle
The needle is a slender metal tool with a pointed tip on one end and a hole (or “eye”) at the other. In a Singer sewing machine, it is the element that carries your thread through the fabric. Needles vary in size and type and are chosen based on the fabric and thread you’re using.
The Needle Clamp Screw
The needle clamp screw is a small screw that secures the needle in place. It is located at the bottom of the needle bar. By loosening this clamp, you can remove the needle from the sewing machine and replace it with a new one.
The Needle Bar
The needle bar is the component that moves the needle up and down. It’s controlled by the handwheel on the side of the machine as well as the foot pedal. The needle is attached to the bottom of the needle bar with the previously mentioned needle clamp screw.
Changing the Needle
To change the needle on a Singer sewing machine, first switch off the sewing machine and disconnect it from the power supply for safety reasons. Lower the needle by turning the handwheel towards you. Then, loosen the needle clamp screw by turning it counter-clockwise. You should be able to slide the needle down and out now.
After removing the old needle, take your new one and insert the flat side facing toward the back of the machine into the needle bar. Then slide it upward until it stops – it should be fully embedded in the needle bar. Tighten the needle clamp screw by turning it clockwise until the needle is securely fixed.
Now, you can reconnect the power supply to the machine and turn it back on. Always remember to thread the needle and try a few stitches on a scrap piece of fabric after changing the needle. This makes sure that the needle is installed correctly and is ready for use.
Be aware that needles should be changed after every project or after 8-10 hours of continuous sewing to ensure optimal sewing performance and avoid any damage to the fabric.
Remember to always switch off and disconnect the machine from the power supply when changing the needle. This simple safety measure will protect you from any potential accidents.
Removing the Old Needle
Preparing to Remove the Needle
Before beginning the process of changing the needle on your Singer sewing machine, it’s essential to take a few preliminary steps. Firstly, switch off your sewing machine to ensure safety during needle removal. Next, lower the presser foot — this will give you space to work and make accessing the needle easier.
Lowering the Needle Position
Turn the hand wheel on the right side of your sewing machine towards you. This manual adjustment brings the needle to its lowest position, which is proper for the removal. At this point, you should be able to see the needle clamp screw clearly.
Loosening the Needle Clamp Screw
Find the needle clamp screw, typically found at the right of the needle. Use a small screwdriver to loosen this screw by turning it counterclockwise. Be careful not to unscrew it entirely — you only need it loose enough to release the needle.
Removing the Old Needle
After loosening the needle clamp screw, grab the needle gently with your fingers or a pair of tweezers. Hold the needle at the top – near the shank – and pull down to remove. If the needle doesn’t come out with a gentle pull, check if the needle clamp screw is loose enough. After removing the old needle, remember to tighten the screw slightly so as not to lose it.
Inserting the New Needle
Identifying the Needle Parts and Orientation
Before attempting to insert a new needle in your Singer sewing machine, examine the needle closely to identify its parts. You should be able to distinguish the shank, which is the upper half, the shaft, the middle part, and the point, at the very bottom. On most sewing machine needles, the shank has a flat side and a rounded side.
Preparing the Sewing Machine for Needle Change
Make sure your Singer sewing machine is first switched off and unplugged to avoid any accidents. Then, set the needle to its highest position by turning the handwheel on the side of machine towards you.
Removing the Old Needle
To remove the old or broken needle, turn the needle clamp screw towards you or counter clockwise direction. This is the tiny screw right above the needle. Once loose, the needle can be pulled down gently and taken out.
Inserting the New Needle
After removing the old needle, take the new needle and hold it with the flat side facing the backside of the machine. This corresponds to the direction in which the machine needle is threaded.
Slip the shank of the needle into the needle bar from below, make sure the flat side is still facing towards the back of the machine. Push it upwards until it can’t go any further. This is to ensure the needle is set at the appropriate height and is secured well in place.
Securing the New Needle
Finally, tighten the needle clamp screw with a firm grip, by turning it away from you or in a clockwise direction. Avoid overtightening as it might damage the needle or the screw. Make sure the needle stays fixed and does not wobble, indicating that it is installed properly.
Remember to always refer to your Singer sewing machine’s instruction manual for specific instructions on how to change the needle as some models may slightly differ in design and operation. And remember that using genuine Singer needles are strongly recommended for optimal sewing machine performance. Ensuring that the needle is correctly installed is crucial for successful sewing projects.

The longevity and efficient operation of your Singer sewing machine significantly hinges on maintaining sharp, well-kept needles. Having delved into the specific parts of the sewing machine that are directly involved in needle replacement, you can now discern the importance and role of the needle, needle clamp screw, and needle bar. Moreover, the step-by-step process of removing the old needle and inserting a new one facilitates a seamless transition to ensure consistency in your sewing ventures. Armed with this knowledge, you can now confidently change needles on your sewing machine, thereby fostering improved sewing outcomes and machine longevity.
Simple Steps to Change a Needle on a Brother Sewing Machine

Easy Guide: How to Replace Sewing Machine Needle